In this section we describe which steps are needed in order to create a new site, both in Site and in AgileSites, and start development.
The first step is to choose a name for your new site. Here I am assume your choice is MySite. Of course if you pick a different name you need to adapt samples accordingly to your choice.
NOTE do not use long names and do not use spaces for your site name. The site name will be used as a prefix (see below), so it is convenient if it is short.
In order to minimize conflicts when more than one site is deployed in your instance, AgileSites follows a simple naming convention:
everything in Sites DOES requires the site name as a prefix everything in AgilesSites DOES NOT require the sitename as a prefix
This recommended naming convention will apply to:
This is a set of sample names recommended for a site named MySite
So we recommend to use always a prefix when naming Types, Attributes, Content and Parent definitions, in order to guarantee the uniqueness of the names. Templates are also automatically named with a prefix when created by the deployer (see later in this tutorial).
In your code however, you will refer to your types, subtypes, attributes and definitions as as "Content", "Home", "Title", "Wrapper". The system is aware of the site name and will add it automatically when needed.
Delete the build.sbt and launch the shell (agilesites.cmd or agilesites.sh)
The configurator will pop up and will ask for the location of your Sites installation and then the name of the site you want to use for developement.
It will be added as the first site in the wcsSites variable in the build.sbt.
If (and only if) you have a virtual host configured (with satellite and apache in place) for your new site then you should also configure virtual hosts mapping.
For example if you have a front-end url http://www.mysite.com for the site MySite that points to http://yourserver/cs/Satellite/mysite
you need to edit the build.sbt and add add a line mapping the site to the
wcsVirtualHosts in ThisBuild += ("MySite" -> "http://www.mysite.com")
You can remove others sites but if they were already installed the installer won't remove configurations for them so they will be still be available in your instance of the application server.
THIS STEP IS IMPORTANT
After changing the name of the current site, you need to reinstall. Installation is needed in order to create the appropriate configurations.
EXIT THE SHELL (in order to reload the configuration file) then follow the reinstallation steps (check the Installation Guide for more details).
This is a reminder if you have already read it.
On Content Server (Sites):
wcs-setup commandOn Satellite Server:
wcs-setup-satellite commandAfter the configuration and the installation of the configuration, you can now create a new site.
Access to the Sites admin (see the image below).

Create a new site with the chosen name (in this case MySite), enabling at least the following assets:

After creating the site, you need also to create an user and assign to that user at the minimum the following roles for your site MySite

Once done you need to log out and then log in again to select your new site as the active site.
Once created the site in Sites, you can use generate the site code from the shell with the command:
wcs-generate site
A popup will appear asking for the site name (use MySite or your own) and the site prefix (use My or your own).
Then you need to deploy templates and cselements for the site.
wcs-deploy
You can learn more on the generated source here.
Accessing the site with (change port according to your installation)
http://localhost:9080/cs/Satellite/mysite
You should see the following screenshot:

It is normal since you do not have yet any page, so the Error Page is displayed, declaring it cannot find the home page (that does not yet exist).
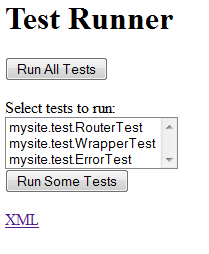
You can then invoke the tester with:
http://localhost:9080/cs/ContentServer?pagename=MySite_Tester
You should see this screenshot:

Clicking on "Run All Tests" you should expect no errors:

You can also select a few tests and run only the selected tests clicking on "Run Some Tests". Try it.
Once the new site and the new project has been created you can generate configuration files for your IDE. Execute the command in the shell:
eclipse
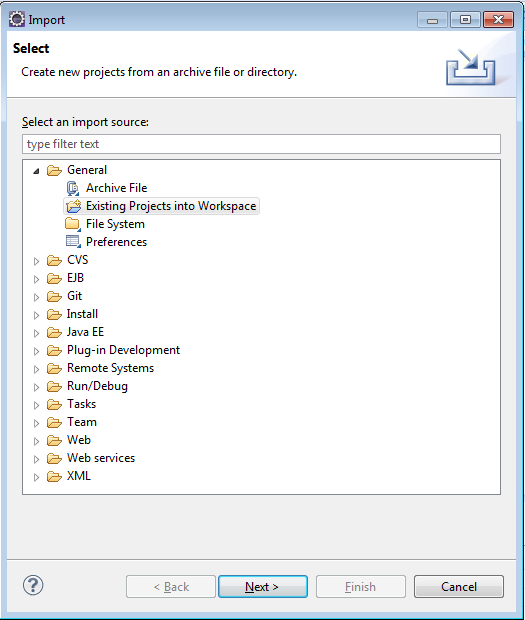
Using eclipse you can then select the following sequence of options to import the projects in Eclipse:
File | Import | General | Existing Projects
opening the main directory of AgileSites. You should see the following screenshot:

then selecting the folder where you unzipped AgileSites, you should see one project.

Import it and you can start development.